Arepas are pure comfort food, a golden, crispy-edged corn cake that’s warm and tender inside, perfect for any meal of the day. If you’ve ever wondered how to make arepas recipe from scratch, you’re in the right place—and trust me, it’s easier than you think. With just a handful of pantry staples and a little hands-on love, you’ll have these delicious pockets of joy ready to fill with your favorite goodies. Let’s dive into all the details and make your kitchen smell like a cozy Colombian or Venezuelan feast.
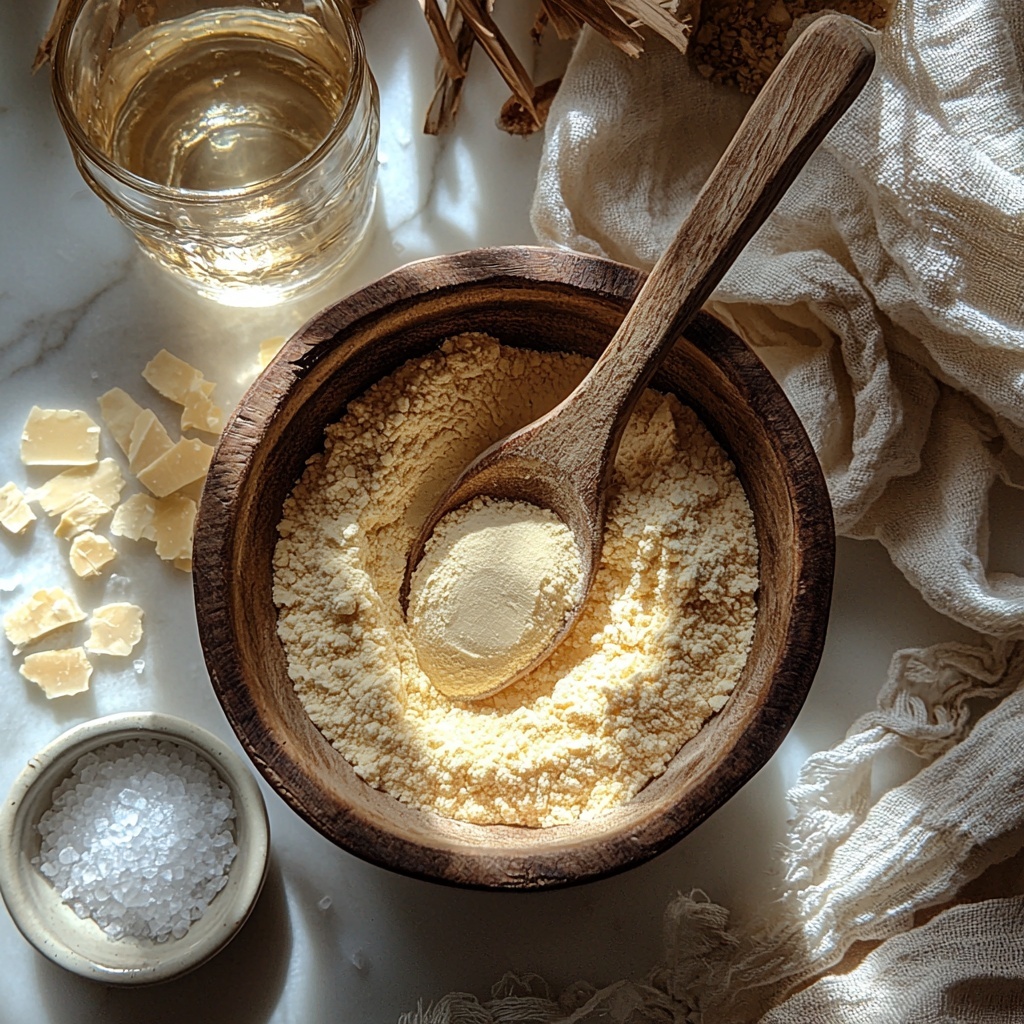
Ingredients You’ll Need
This recipe keeps things straightforward with ingredients that are simple but essential. Each component plays its part in creating the perfect texture and flavor that make arepas so irresistible.
- Warm water: Activates the masa flour and helps bring the dough together smoothly.
- Salt: Enhances the natural corn flavor and balances the taste perfectly.
- Shortening (butter flavored, melted): Adds a subtle richness and helps with the golden crust.
- Instant corn masa flour: The heart and soul of traditional arepas, giving them their signature corn flavor and texture.
How to Make How to Make Arepas Recipe
Step 1: Prepare the Oven and Dough
Start by preheating your oven to 350 degrees Fahrenheit. Then, in a large bowl, combine the warm water, salt, and melted shortening. Slowly add your masa flour, mixing thoroughly after each addition with a spoon. When the dough gets thick enough, switch to mixing with your hands until everything is just combined. Cover it with a moist towel and let it rest at room temperature for 10 minutes—this step lets the dough absorb the water fully, creating that perfect pliability we want.
Step 2: Shape Your Arepas
Use a half-cup scoop of dough to roll into a ball, then gently flatten it into a circle about 4 to 5 inches in diameter and half an inch thick. Here’s a fun little test to perfect your dough consistency: place your arepa dough on the palm of your hand and quickly flip it over. If it sticks for one or two seconds before dropping off, you have the right texture! If it slips off instantly, add a splash more water; if it clings too stubbornly, sprinkle in extra masa flour. This feel rule makes a huge difference!
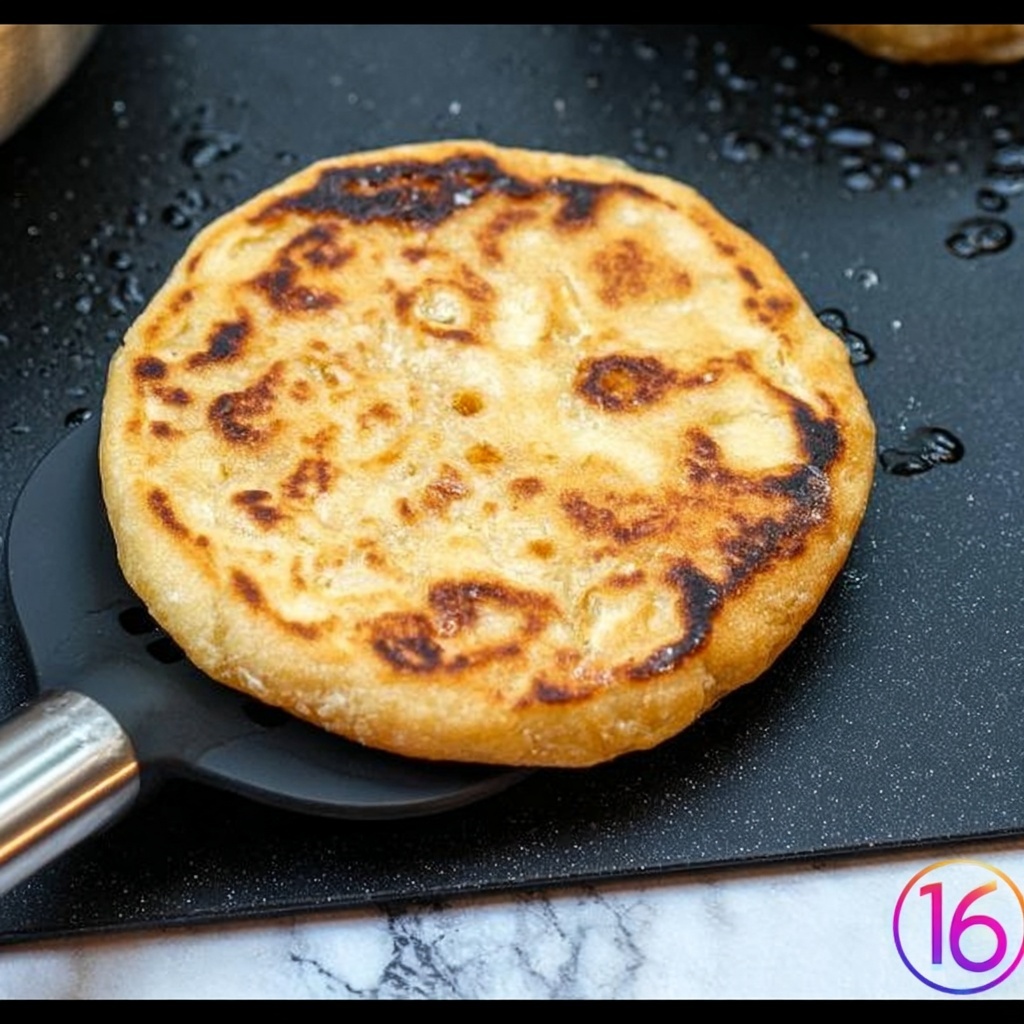
Step 3: Cook on the Griddle
Heat a griddle or cast iron skillet over medium-high heat (around 400 to 450 degrees). Melt a tablespoon of butter or shortening, then place your arepas on the hot surface. Cook each side for about 3 to 4 minutes until they develop a gorgeous golden-brown crust. This initial searing locks in moisture and adds a lovely depth of flavor that you’ll adore.
Step 4: Bake to Finish
Once all arepas have been nicely seared, transfer them onto a baking sheet. Place them in your preheated oven and bake for 12 to 15 minutes. This final bake ensures the inside cooks through fully and becomes tender while your exterior stays crisp. After they come out of the oven, slice your arepas in half and get ready for the best part—stuffing!
How to Serve How to Make Arepas Recipe
Garnishes
Arepas are wonderfully versatile when it comes to toppings and fillings. Garnish with creamy avocado slices, crumbled queso fresco, or a spoonful of tangy sour cream to add contrasting flavors and richer textures. Fresh cilantro or a pinch of smoky paprika can also elevate the presentation and taste.
Side Dishes
Complement your arepas with hearty beans, fried plantains, or a fresh tomato and onion salad dressed in lime juice. Each pairing brings a different vibe, whether you want a light and fresh accompaniment or something more robust and comforting.
Creative Ways to Present
Try splitting your arepas open and piling them high with shredded chicken, black beans, cheese, and a drizzle of hot sauce for a flavorful sandwich-style meal. For a breakfast twist, stuff them with scrambled eggs and sautéed veggies. You can even slice them into wedges and serve as a crispy appetizer with dips like guacamole or a smoky chipotle sauce.
Make Ahead and Storage
Storing Leftovers
Leftover arepas keep beautifully in the fridge for up to 3 days. Wrap them tightly in foil or store in an airtight container to preserve their moisture. When you’re ready to enjoy, simply reheat gently to bring back their softness.
Freezing
To enjoy later, freeze uncooked or cooked arepas by placing them in a single layer on a baking sheet until firm, then transferring to a freezer bag. They will keep well for up to 2 months, making it super convenient to have your favorite corn bread ready at any time.
Reheating
Reheat your arepas on a skillet over medium heat or in the oven at 350 degrees Fahrenheit until warmed through and crisp on the outside. Avoid microwaving if you want to keep that irresistible texture intact!
FAQs
Can I use regular cornmeal instead of instant corn masa flour?
Regular cornmeal won’t absorb water the same way masa flour does, so it’s best to stick with instant corn masa flour for the authentic texture and flavor that make arepas so special.
What fillings work best in arepas?
Arepas pair wonderfully with a variety of fillings including shredded meats, black beans, cheese, avocado, or even grilled vegetables. The key is balancing savory, creamy, and fresh elements to complement the corn flavor.
How thick should I make the arepas?
A half-inch thickness is ideal for cooking through without burning the outside. This thickness also provides a nice balance between a crisp crust and a tender, chewy interior.
Can I make arepas gluten-free?
Absolutely! Instant corn masa flour is naturally gluten-free, so this recipe is safe for those avoiding gluten unless you add fillings that contain gluten ingredients.
What’s the best way to store leftover dough?
Cover leftover dough tightly with plastic wrap and store in the refrigerator for up to 24 hours. Bring it back to room temperature before shaping your arepas to ensure the best texture.
Final Thoughts
Now that you have everything you need to master how to make arepas recipe, I hope you’re feeling excited to bring this comforting and delicious dish into your kitchen. There’s something so satisfying about making these golden corn treats by hand and customizing them with your favorite fillings. Give it a try—you might just find your new go-to dish that everyone will ask you to make again and again!